Unlock Pokecut VIP for just
Home > Blog > How to Merge Two Images?
How to Merge Two Images?

Contents
The Art of Background Changing in Image Merging
Four Steps to Perfect Background Changing
Practical Applications of Image Merging
Pokecut vs. Traditional Tools
Advanced Techniques for Creative Compositions
Conclusion
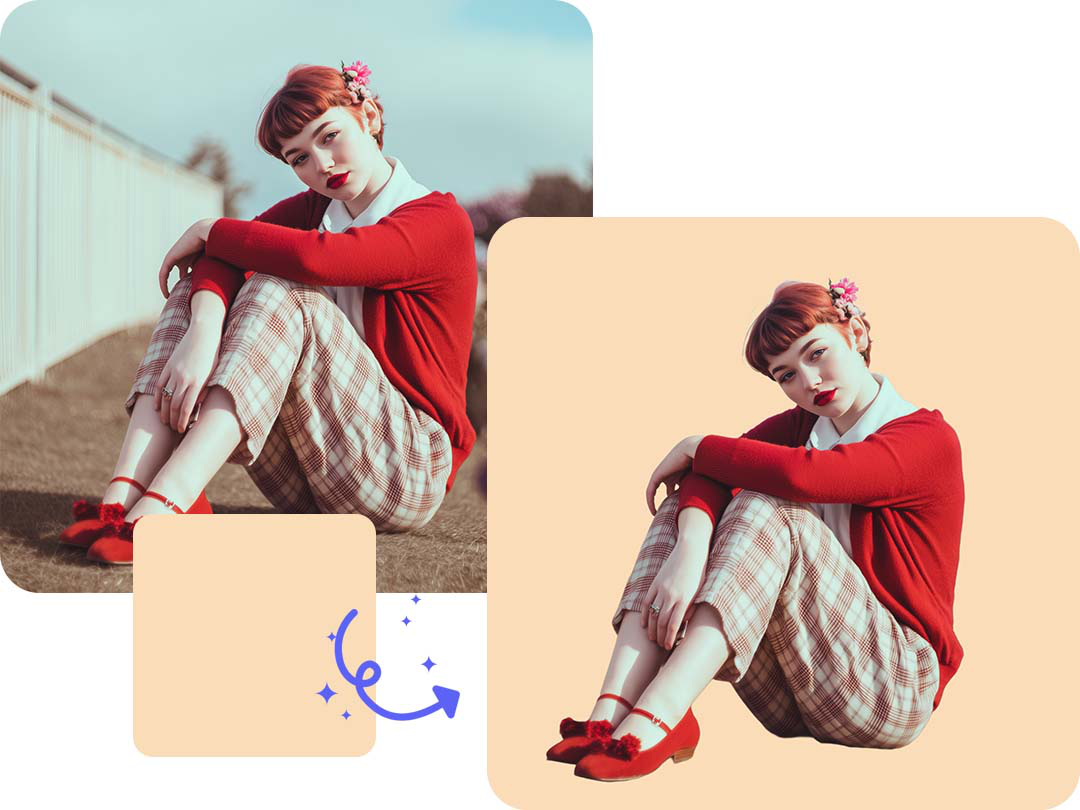
Want to combine two images into a harmonious composition? Pokecut’s Background Changer tool redefines image merging through AI-powered subject extraction and intuitive background replacement. Whether refreshing portrait photos, optimizing product images, or creating creative composites, this tool streamlines the process into three simple steps. Below is a guide on transforming ordinary images into professional-grade composites, exploring practical applications, and unlocking advanced editing techniques with Pokecut’s complementary tools.
The Art of Background Changing in Image Merging
Background changes take picture merging beyond basic puzzles:
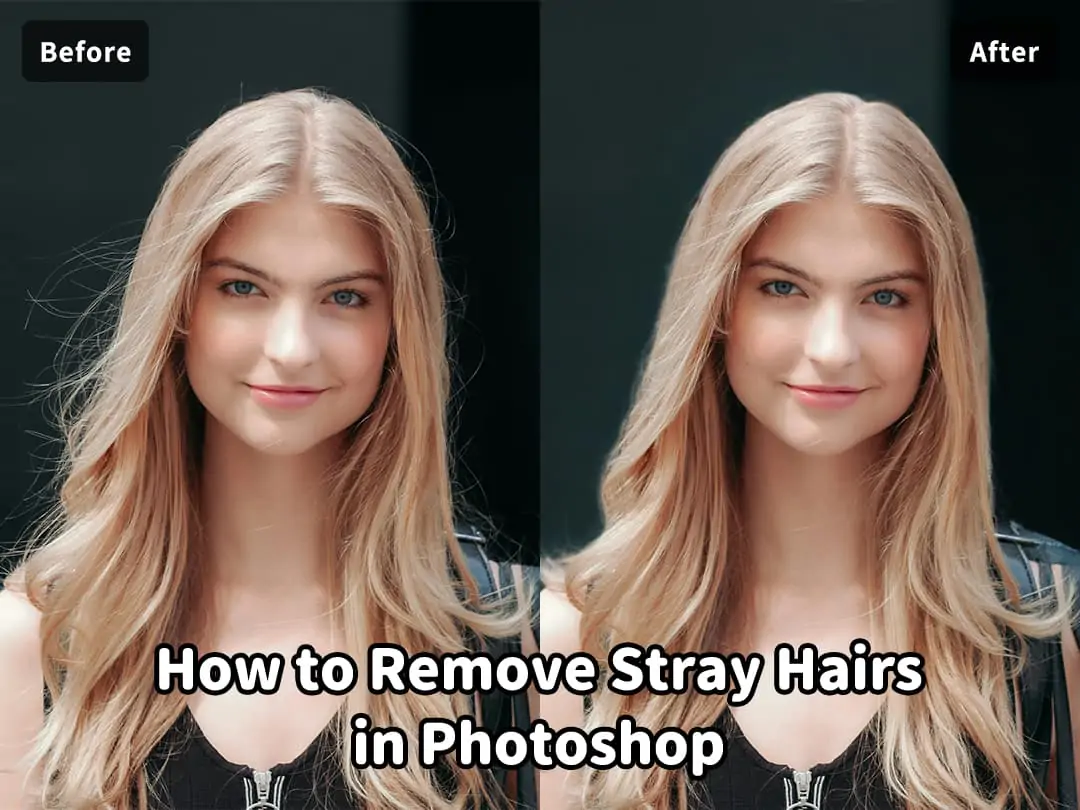
- Precise Subject Isolation Powered by advanced AI algorithms, the tool automatically detects and extracts subjects with remarkable precision. It achieves up to 98% accuracy in handling intricate details like delicate hair strands, transparent glass surfaces, or reflective metals—eliminating the need for manual tracing. For instance, it can flawlessly isolate a model’s flowing hair from a busy street background or extract a crystal vase without losing its refractive edges.
- Natural Light Harmonization Pokecut goes beyond simple background replacement to analyze the lighting conditions of the new background and automatically adapt. It automatically optimizes the shadows, highlights and color temperature of the subject to fit the new environment. Whether the new background is backlit by a sunset or studio lighting, the system ensures that the subject blends seamlessly, avoiding the "cut and paste" effect.
- Creative Flexibility Designed for users without design skills, the tool unlocks endless creative possibilities. Swap cluttered backgrounds with serene mountain landscapes, place electronic products in cozy living room setups, or layer multiple artistic elements (like overlays or textures) to create gallery-worthy composites. It supports custom background dimensions (e.g., 16:9 for videos or 1:1 for social media) and offers preset templates for quick transformations, making professional-grade image editing accessible to everyone.
Four Steps to Perfect Background Changing
1. Upload the First Image
Start by uploading the original photo containing the subject you want to keep. The platform supports common formats like JPG and PNG, preserving high resolution for optimal results.

2. AI Automatically Detects the Subject and Removes the Background
The AI algorithm instantly analyzes the image, identifies the main subject (whether a person, product, or object), and removes the original background. This process takes only seconds and precisely handles details like hair and complex edges. This AI image editor makes professional-quality editing fast and effortless.

3. Upload the New Background and Adjust the Subject
- Select a New Background: Upload the second image you want as the new background.
- Adjust Subject Size and Position: Use intuitive controls to resize the subject for harmony with the new background and fine-tune its position for perfect composition.
- After previewing the final effect and ensuring it’s perfect, download the high-definition image in formats like JPG or PNG, suitable for social media sharing, printing, and other scenarios.

Practical Applications of Image Merging
1. Portrait Photo Transformation
- Lighting and Background Coordination Tips If the original image is underexposed (e.g., backlit portrait), prioritize light-colored backgrounds (e.g., off-white, light pink) to naturally brighten the subject’s face via reflection. For example, replacing a backlit portrait with a seaside background uses the blue water’s reflection to soften facial shadows. If the new background is a sunset scene, position the portrait toward the light source (e.g., face the upper-left sun) to naturally illuminate the face through composition.
- Size Adaptation Tricks When creating a vertical poster (e.g. 9:16 mobile ratio), if the portrait and background are different sizes, you can freely adjust the position and scale of the subject and background for easy composition adjustment.
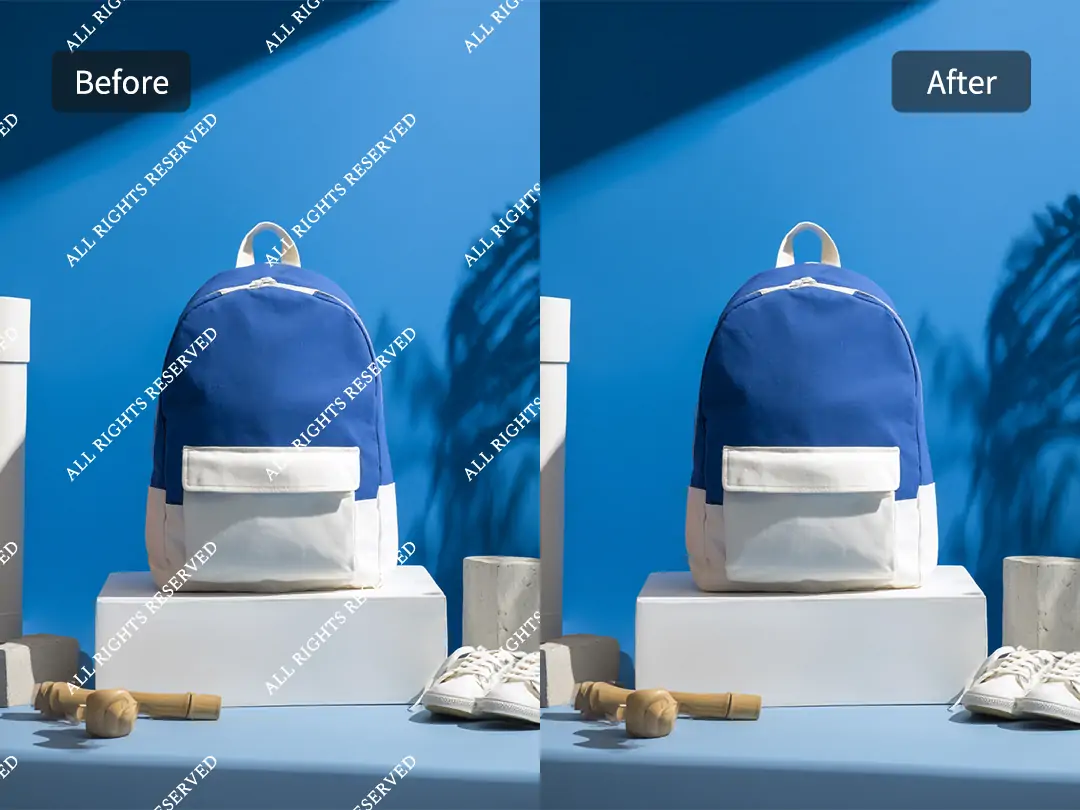
2. E-commerce Product Image Optimization
- Single-Image Refinement Process When processing product images, upload the original, cut out the subject, and replace the background with a lifestyle scene (e.g., living room, office desk). If the product has rough edges, the system automatically softens them. After finishing, custom-adjust the image size and download it in high-definition JPG/PNG format.
- Detail Enhancement Techniques For fine products like jewelry or watches, upload original images with a resolution of ≥2000×2000 pixels to ensure clear details after cutting. If reflections on the product surface cause missing cutout areas, use the "Brush Tool" to manually remove glare and complete the subject’s edges.
3. Social Media Content Creation
- Holiday Theme Composite Tips Take Christmas composition as an example: upload a portrait, select a snow scene template from the background library, and drag a Christmas hat element from the sticker library onto the portrait’s head. When adding holiday text, click the text box to select "Shadow Effect" (45° angle, 30% transparency) to make the text more three-dimensional against the snow background. Choose text colors that match the theme for visual harmony.
- Short Video Cover Production Guide When making a Douyin cover (9:16 ratio), position the portrait at the center of the image (occupying about 60% of the frame). Click the text tool to add a title, selecting "Fangzheng Bold Black Simplified" font and bolding it. Use a color contrasting with the background (e.g., yellow for a blue background). After finishing, click "HD Export" to ensure the cover displays clearly on mobile devices, with the file size controlled within 1MB to adapt to short video platform loading requirements.
Pokecut vs. Traditional Tools
| Feature | Traditional PS Software | Pokecut Background Changer Tool |
|---|---|---|
| Subject Extraction | 10+ minutes of manual operation | 8-second AI intelligent cutout (automatically identifies details like hair/glass) |
| Edge Quality | Jagged edges from manual feathering | Intelligent edge optimization (automatically generates smooth transitions) |
| Size Adaptation | Manual stretching (prone to distortion) | Proportional scaling (supports custom pixel values) |
| Operation Threshold | Requires mastering professional functions like layers/masks | Three-step foolproof operation (upload-replace-download) |
Advanced Techniques for Creative Compositions
1. Remove Distracting Elements with AI Magic Eraser
Before changing the background, leverage the Magic Eraser tool to refine the image. This AI-powered feature swiftly removes distractions like price tags, dust spots on products, or stray garnishes around food items in culinary shots. By eliminating these elements beforehand, the subject maintains a polished appearance, ensuring the final background replacement looks professional—ideal for e-commerce listings or marketing materials where visual clarity is essential.

2. Add Fun with Emojis
Post-background replacement, enhance the visual narrative using the Emoji tool. This feature lets you overlay thematic icons that complement the new backdrop—for instance, adding beach-themed symbols to a travel photo transformed into a coastal scene, or inserting party-related icons into a birthday portrait with a celebration-themed background. These elements can be resized, rotated, and positioned to blend naturally, creating playful or thematic accents that resonate with social media audiences or marketing campaigns.

3. Enhance Image Quality with Super Resolution
For low-resolution images, use the Super Resolution tool before changing the background. This neural network-driven feature can repaire blurriness in vintage product shots or old family photos. By sharpening details like fabric textures, product engravings, or facial features, the tool ensures that when the background is replaced, the subject’s edges remain crisp and the overall composition looks print-ready—perfect for high-definition displays, brochure design, or canvas prints.

Conclusion
Pokecut’s Background Changer tool transforms image merging from a technical challenge into a creative journey. Whether for personal projects or professional design, its intuitive AI-driven workflow enables anyone to create stunning composites—no design skills required.Ready to reimagine your photos? Visit Pokecut now to start your image merging journey with ease. Try the tool for free and discover how simple it is to replace backgrounds, enhance details, and bring your visual ideas to life.


Copyright © 2026 Pokecut All Rights Reserved.